Week 9: 23 September

Day 1

The sticking point is turning into a mountain, converting video to images using an Azure serverless function.

I have found another library wrapper for FFMpeg, called NRico, but this has 2 versions, a free version using .Net fundamentals and a .Net core version for $75.

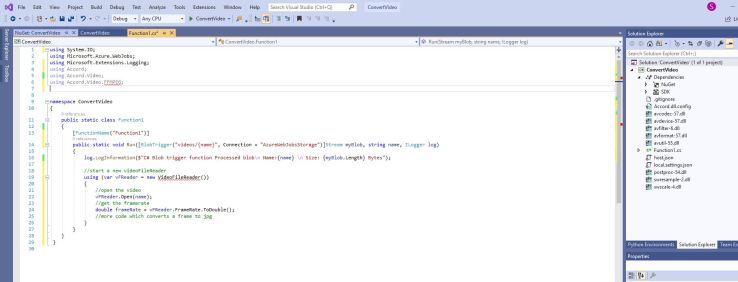
I will have a go building a Version 1 function app. and see what happens.
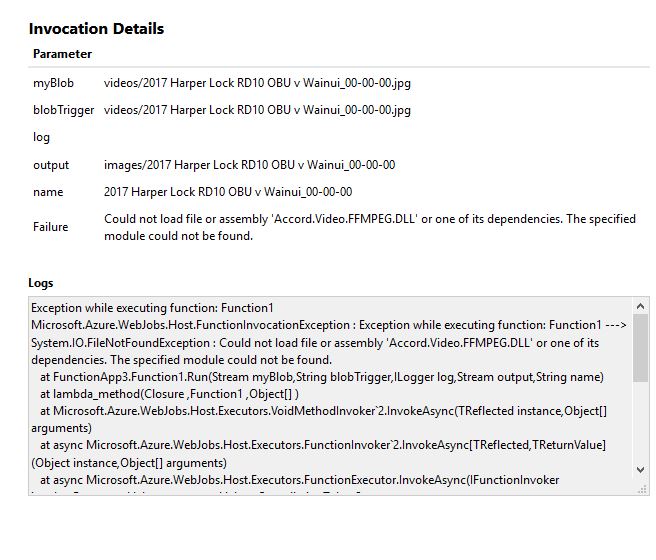
MS advisors got back to meĀ  regarding Fridays errors with a version 1 function running Accord FFMpeg. They used my code snippets and built the App in their own environment, they have the same errors as me and are unable to run the function, at least I know its not just me and my computer. They have passed the problem higher up the chain.

Some more advice from MS, I can consider using a Container Instance to run the code. A container instance works in a logic App and can be event driven. An event can start a container instance which would then run the conversion code, the container stops when the code is finished. Billing is per second for the life of the container. One issue is the container instance needs a docker image to launch an instance.

After some research, this is a complicated solution to my problem and is a potential solution to the final product but a little too involved for my project.

Day 2

Further exploration into NReco and a few other FFMpeg wrappers that are available as NuGet packages with GitHub examples and support.

The biggest difficulty I have is getting the metadata out of a video file with these other wrappers.

I am unable to get the frame rate and duration data that I need to identify a specific frame in a video, this means my labeling code would not work to add a time to an event.

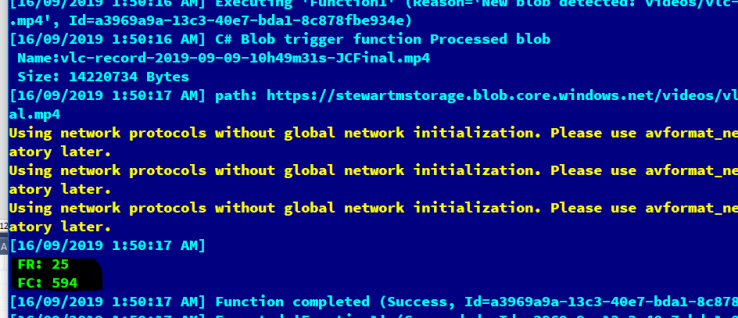
Using FFMpegCore, I was eventually able to get a frame rate, but there are issues with saving files to a container, saving to a URL is tricky.

CodeWorkedFPS25

I also experimented with FFMediaToolkit, with no success.

FFMediaFramemaker

Day 3

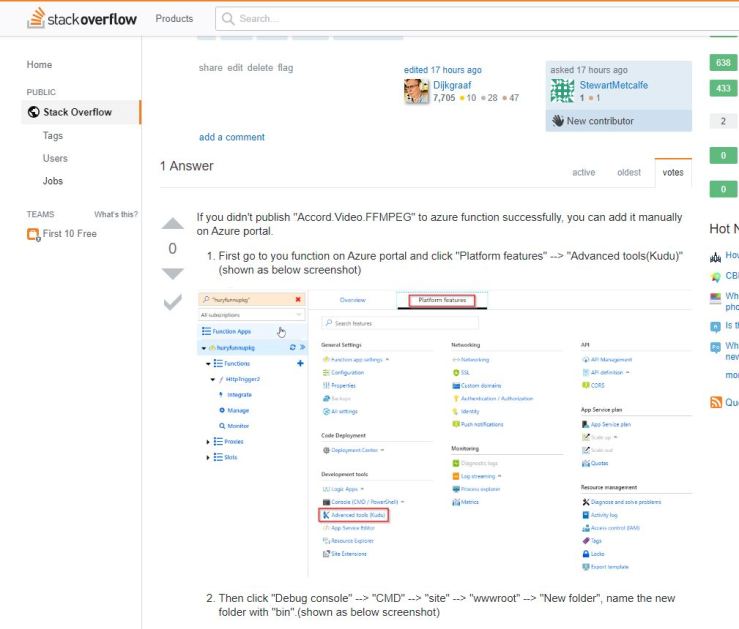
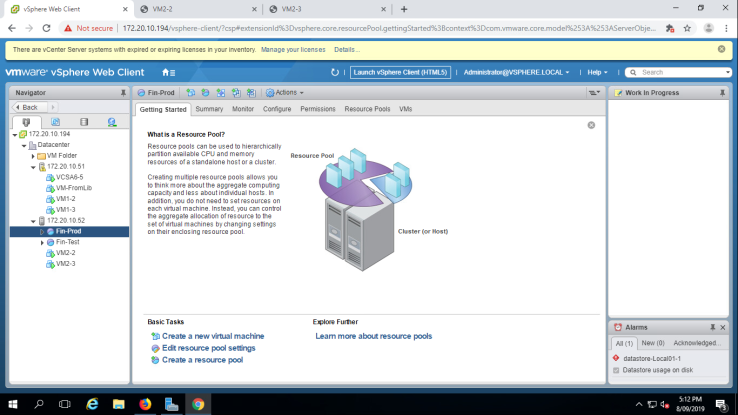
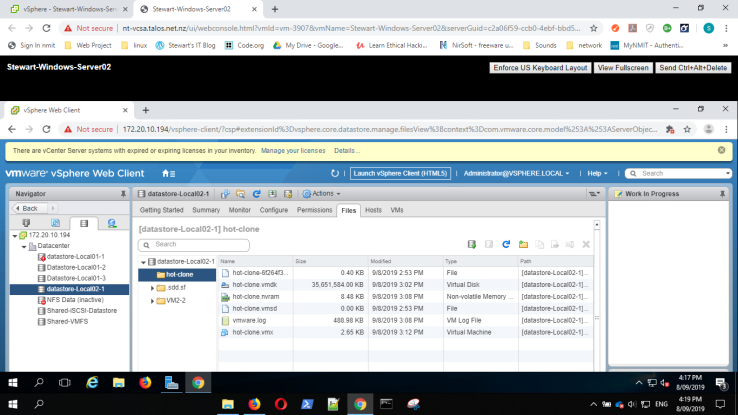
A little fiddling around with NReco and saving the images using Kudu services. Kudu Services is the environment in which the Function App resides and has a console and user interface which allows exploration of the directory structure of a Function, I can add folders to this directory and save files here.

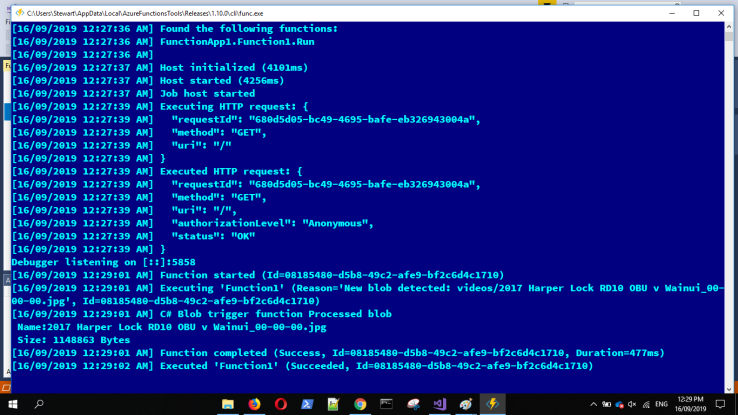
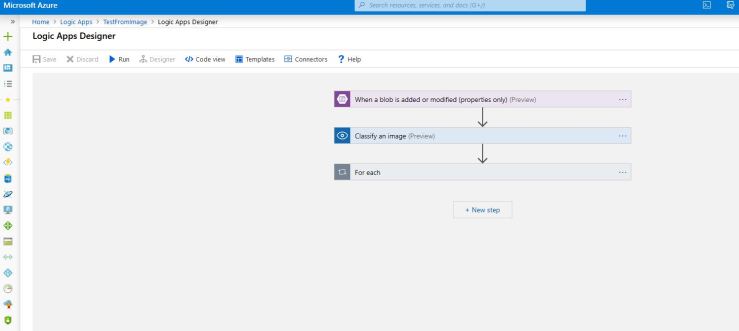
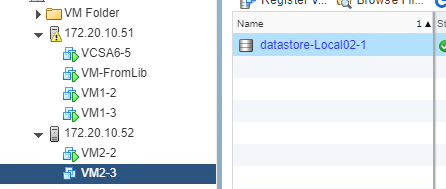
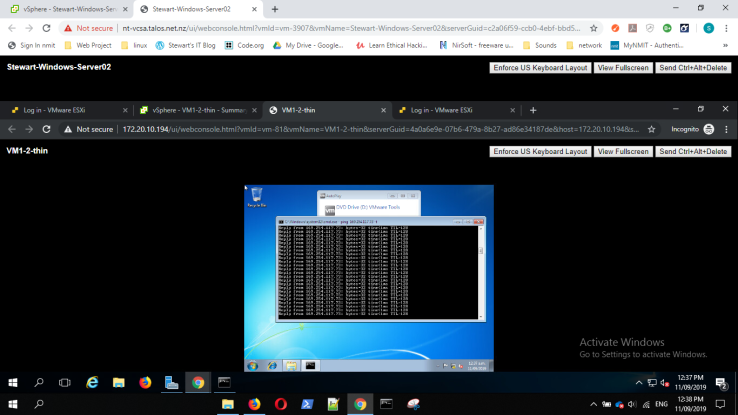
I was able to get NReco working in a function App, it takes a URL as an input, the URL of a video in a container and converts a frame every second into a jpg.

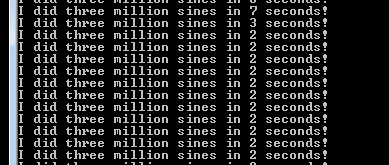
The function “timed out” after 5 mins, the default running time of an App, unfortunately MS Azure didn’t work as expected the function ran incredibly slow, taking about 2 seconds to extract a frame and save an image, so not the scaling and speed I expected. This means that a Function App will never handle a 3Gb video as MS initially suggested it would. This also means that Accord FFMpeg will have the same problem in a Function.

Back to the drawing board, for the project I will convert the video to frames to images on a local machine and then upload the images to a container.

Day 4

For the project, I have abandoned video – image conversion on Azure.

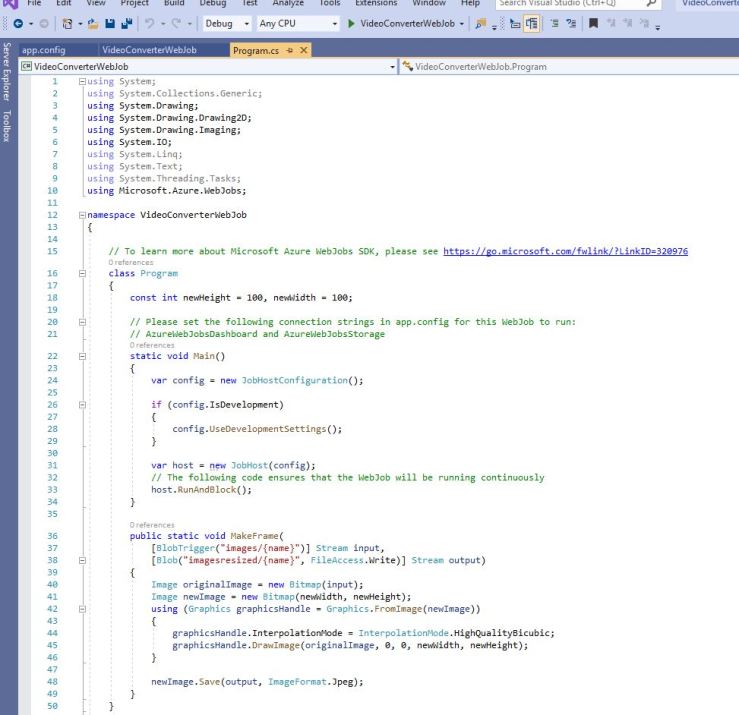
I have combined the Conversion and Upload code into 1 app.

I have also changed the logic a little so now the app only reads every 25th (or 30th depending on the frame rate), previously I was reading every frame but only saving every 25th/30th, this saves loading 24 frames into memory, hopefully will achieve a speed advantage.

I ran the App with a 3GB video, this took 50 mins to convert and then upload the images to Azure.

upload

This would be an ideal place for investigating multi-threading and asynchronous tasks in future, convert and upload at the same time, instead of the current convert all and then upload all.

I have also managed to get a progress bar working on the image up-loader using threading and “BeginInvoke”, another learning experience.

Capture

I have no error checking yet and I can upload a video to a picture container! This will have to be changed so that the video goes to a video container obviously.

Final Words for a while

Next week starts a mid-semester 2 week study break.

I will take this opportunity to recharge my batteries a little. I will still be spending some days at the work place to work through the challenges I have encountered, but will be taking a break from blogging.

So, anticipate the next blog in week 12, after the start of the week on 14 October.

Week 8: 16 September

Day 1

I have continued to build a Web Job app that I started last week in an attempt to get the Accord Video Libraries to work in the Azure environment.

In the course of researching this and looking for examples of code, I came across a suggestion regarding Azure function and Visual Studio.

It seems that earlier versions of VS, like 2017 allow the choice of building a Version 1 or 2 Azure function. So I have experimented with building a function on my own machine which is running an older version of VS 2017.

I can use a file path or an https endpoint as the input sting for the VideoFileReader which is great because each Blob in Azure storage has an URL address and not a file path.

An important learning experience here, the string can be a URL but any spaces in the filename breaks the URL and the file is not found. I will also have to re-code my file upload function to check for and replace any spaces in the file name.

The function, running in debug mode on my local machine is working, I drop a video file into the blob storage container and the code is triggered and works as expected and integrates with Accord FFMPEG dll with no issues.

The function is triggering correctly.

Screenshot (217)

I can now see the extracted frame rate and frame count variables.

WorkingFxFramerateofVideo

And can rename the frames.

FunctionCreates File Namesforframes

Day 2

Aah, the joys of Azure, the old story of “it works on my machine but…”.

FFMPEG error on Azure

The same problem again, the Accord FFMPEG dll breaks the code.

Back to Google and try and find a work around or another way of converting video to images.

Day 3

A half day today, so I’m taking a break from the video-image problem.

I need to re-make the Uploader to remove any spaces from the file names and I want to redesign the app a little to upload videos, images and documents to their individual containers.

A few extra lines of code and the app checks the file name for spaces and replaces them with “dash”. Important not to replace with underscore as another part of the code splits the filename at a later stage based on an underscore.

I have also messaged Micrsofts team for advice on the FFMPEG dll issues.

DayĀ  4

A meeting with the sponsors, Ted and Jamie who came up with this idea.

We are looking at the progress of the project, they are surprised and impressed with progress to date.

We also discussed what they envision the final product to be, an App on a local computer versus a web app.

Advice from MS is to try build the Converter function directly in Azure as a Version 1 function, so I will give that a try.

Capture

The same error, no matter what the Azure function cannot find the dll.

I will email the MS team, and sent then a code snippet and the error and let them have another go.

Another frustrating week.

Week 7: 9 September

Day 1

As recommended by Microsoft, I have created a DataLake on the Azure account. This will be used for its ability to work with a hierarchical folder structure, unlike Blob storage which only has containers.

The rest of the day was spent trying to convert my local visual studio C# project to an Azure function. The problem is the function in Azure does not recognise the FFMPEG NuGet package.

VSErrorFFMPEG

My first question in Stackoverflow.

FirstStackOverflowQ

Day 2 and 3

Ongoing frustration with Azure functions and the Accord FFMPEG.

I have asked my first questions on the Microsoft forum, GitHub and Stackoverflow.

The function needs to convert a video to frames and I have build a windows form app which works perfectly on my computer but doesn’t translate to an azure serverless function.

Lots of research and learning later, it seems the problem is the Accord FFMPEG Dll. The other Accord libraries have Dlls for .Net Standard but FFMPEG only has .Net Framework dll, there is no .Net Standard or .Net Core Dll. The Azure functions use .Net Core, so the .Net Framework Dll does not work here.

Screen snip of an error – DllImport issues.error

A question for the microsoft forum.

MS forum question

An answer from Stackoverflow with a partial fix for my issue, which then generated the DllImport error.

StackAnswer

Day 4

Brainstorming with colleagues, a solution presents itself. Instead of an Azure function, I will build a WebJob in Azure. Very similar to a function, its a script or exe which can be triggered and then runs. The advantage for me is that it uses .Net Frameworks and this means I do not have to redesign my Video Converter to work with .Net core.

A little research later and I am building my WebJob.

Next issue that arose was the input into the webjob. Currently I am loading a locally stored video file into the Windows Form App using VideoFileReader.Open(name) where ‘name’ is the complete file path to a local file, this won’t work in the cloud with files stored in a blob.

It seems that every blob has a URL endpoint and I can use this URL as the string to replace ‘name’.

Now just need to parameterize this endpoint URL.

This is a colleagues web job example whichĀ  we got to work on the blob images container as a test.

WebJob

Week 6: 2 September

Day 1

Today the plan is to update my blog, which I forgot to do, so here I am in October updating this page.

I am also going to explore Azure Logic Apps.

A Logic App is a service in Azure which acts as a pipeline or a series of steps in the cloud. It creates a workflow with inputs and a final output.

The input for the final logic app will be an XML document arriving in a document container, this will trigger the Logic App which will then email the XML document as an attachment to my email address.

logic App

This Logic App designer is a great GUI which allows the pipeline to be created relatively easily.

The Logic App at work:

Logic App

Initially, I was using a step called “Get Blob Content” but this didn’t allow me to dynamically email the document, the document name had to be specified, not much use as the document name changes with each video to match the video name.

The App works and sends me an email with a test document which I uploaded directly to the documents container.

FileInEmail

I found that using “Get blob content using path” as shown above allowed me to get the filename of the blob which triggered the Logic app, so the filename gets sent down the pipeline and is attached to an email.

Day 2

This turned into a wasted day.

Thinking of how the Function App only runs for a maximum of 10 minutes and then stops (this means that a 90 min will never stand a chance of being converted to images), I decided to look into splitting a video into shorter segments.

Despite numerous searches, I couldn’t find a way of doing this in code, there must be a way, but it eludes me. I can easily do this on my machine locally using VLC Media Player, but that’s not helpful for the project.

vlc

So I abandoned this plan.

I also looked into more alternate FFMPEG wrappers, but it seems most of the require the actual FFMPEG executables, so I also abandoned this approach.

Day 3

My half day at work.

I had a brief look at the Storage account and Blob life-cycle management. We haven’t decided yet on storage length for any of the videos, images or documents. My opinion is to delete everything after it has been consumed, delete the video after conversion, delete the images after classification and eventually delete the XML document.

I added a “document” container to the storage account and set a life-cycle policy, the files will move to cold storage after 7 days and delete after 30 days, this will minimize the storage charges.

The next step was to look at designing a Logic App to send an image from a container to Custom Vision, there is a step in beta release which may be useful.

This was my attempt.

Logic App Attempt

I was hoping to trigger with the image arriving and produce a document as the end result but unfortunately this approach wasn’t possible, so I will go with a Function App triggered by the image which will classify the image and save the result as an xml document.

Day 4

I spent the day building on my Classification Function App. This will trigger when an image arrives in an “images” container, the image will be sent to Custom Vision and the result will be saved as an XML document.

Lots of coding later and it works.

This shows the code working in a debugger on my computer, the image triggers the code:

Working Azure Function

And as can be seen on the right of the following image, an XML document is produced with the classification prediction result.

XMLdocument produced

A few code tweaks were needed to fix the file name for the XML document, with the removal of the jpg extension and also the “time” element of the name.

The images arrive with this name format “{video Name}_00-01-12.jpg” and the Xml document needs this format “{video Name}.xml”.

This is a code snippet for this process:

fixXMLname

The first 2 lines are a quick hack to remove a files extension, give it a path name and then get the filename without the extension. This will also work with .bmp and .png.

The rest is self explanatory, replace any spaces, trim anything from the end which isn’t a letter and add xml extension. The document now has the video name.

The last step is to save the xml document to the document container.

VMware vSphere Lab 20

Implementing a vSphere DRS Cluster

A Distributed Resource Scheduler is essentially a load balancer to ensure the load on the network is equally spread across the available ESXi hosts. This will reduce the impact of a high load on the end user.

Task 1: Create a Load Imbalance

Here we manually migrate all our machines to a single host to simulateĀ  load imbalance.

The joys of working with Talos. My virtual Appliance has frozen, and will need a restart, a painful 15 minute procedure —— waiting.

As always I will experiment with the ESXi host 2 as host 1 has my Server Appliance and I don’t want to risk this, so I will migrate the VMs to ESXi 2.

Screenshot (194)

CPUBusy isn’t installed, so back to the ESXi hosts and load the classroom file iso, so now the VMs can access this disk and I can installĀ  and run CPUBusy on each VM.

Screenshot (195).png

Task2: Create a DRS Cluster

Screenshot (196).png

Completed task 2.

Task 3: Verify proper functionality of the DRS Cluster

This can be run manually, partially or fully automated.

Question 1: Running 4 versions of CPUBusy on each machine and only a slight imbalance, lets run more.

Screenshot (198)

And only 50% cpu utilisation with 3 VMs running multiple scripts, so more needed.

Running 30+ instances of CPUBusy across 3 VMs finally I received a migration recommendation.

Screenshot (200).png

And a machine is migrated to host 1.

Screenshot (201).png

And no new recommendations

Screenshot (201)

Running 5 VMs with 50+ instances of CPUBusy finally got the bubble to move out of centre.

Screenshot (203).png

And after following the recommendation a VM migrated and the bubble moved back.

bubble

This task required a significant large number of VMs running multiple scripts to emulate the Lab.

Task 4: Create, Test nd Disable a VM-VM Affinifty rule

Whether selected VMs run on the same or different hosts.

Machines are on 2 different hosts

Screenshot (204).png

I’m using VM1-2-thin and VM1-3-thin for this task, they are now on different hosts.

The rule is created to keep them together.

Screenshot (206)

The affinity rule is recommended.

Screenshot (207).png

And they are both on host 2 now.

same host

The final step disables the rule.

Task 5: Create, Test and Disable the Anti-Affinity rule

Not surprising we will force VMs onto separate hosts.

2 VMs, VM1-2-thin and VM1-3-thin were moved to the same host in Task 4, we will now create a rule to separate them.

Screenshot (208)

The recommendation appears and the VM is migrated.

Screenshot (210).png

They are now separated

sep hosts

And the last step deletes the rule.

Task 6: Create, Test and Disable a VM-Host Affinity rule

The same procedure can create a rule to specify which host to run a group of VMs.

I selected all my VM1-thin VMs to group together and host 1 for their Host group, slightly different from the Lab using VM2-* and Host 2. I did this to show understanding and not just parroting the Lab.

Screenshot (211)

Screenshot (212)

Then add a rule to associate the groups

Screenshot (213).png

There is now a migration recommendation to apply this rule to a VM.

Screenshot (214)

The recommendation is to migrate VM1-3-thin to fix a rule violation, this VM is currently on host 2 and the rule says it must be on host 1.

Accept the recommendation and the VM migrates.

host rule

The VMs I defined in the rule are now all on host 1.

An interesting bug, despite these rules being enabled I was still able to manually migrate a VM1-* to host 2, and I further created another rule which associates all VM2-* VMs to Host 2.

And double checked all the rule settings, but all are correct.

But the I did get the DRS recommendation to migrate the VM back to Host 1 to fix the rule violation.

Screenshot (216)

So the rule is working as it should, despite this lack of a compatibility error during the manual migration attempt.

The last part just disables the rules.

Critical Thought

This Lab actually worked mostly as advertised in the Lab manual and introduced me to the load balancing concept in vSphere and how to do it.

I am conceptually familiar with this topic as a result of load balancing Cloud virtual servers.

The Lab showed manual DRS in order to demonstrate the steps and principals. In reality this would all be automated.

The only issue experienced was the number of VMs running multiple instances of CPUBusy to achieve and unbalanced system and a migration recommendation, I guess I have more CPU capacity in my environment than vSphere would make available to demonstrate this functionality in their Lab, no doubt they throttled the lab CPU for ease of demonstration.


VMware vSphere Lab 19

Using vSphere HA

Task 1: Create a Cluster for HA

Screenshot (169)

Task 2: Add ESXi Host to Cluster

The ESXi hosts are dragged to the cluster, moving ESXi host 2 first so it becomes the master. We do not want to switch off ESXi 1 for testing because this will switch off our vSphere Appliance.


Screenshot (172)

Master is 172.20.10.52, ESXi host 2.

There are 6 VMs in the cluster and all 6 are protected.

The iSCSI datastore is used for the heartbeat.

Screenshot (173)

Configuration warnings.

Screenshot (174)

The management configuration.

Screenshot (175).png

EnableManagement.PNG

This resolved the management configuration issues.

Task 3: Test the HA functionality

Currently ESXi 2 has 2 VMs running, VM2-3 and VM2-2-thin

Rebooting the ESXi host 2 simulates a failure. 2 things happened VM2-2-thin restarted but the VM2-3 couldn’t migrate because it has a thick provisioned disk needing too much storage space.

Screenshot (177)

And is now on Host 1: 172.20.10.51

Screenshot (178)

Confirming the VMs on the ESXi 1 host

Screenshot (179)

And the master has changed to ESXi host 1

Screenshot (180)

Task 4: View the HA cluster resource usage

Screenshot (181)

  • Total Reservation Capacity = 16.81 GHz
  • Used = 8.4 GHz
  • Available = 8.4 GHz

CPU res

Screenshot (182)

  • Total Reservation Capacity = 20.53 GHz
  • Used = 12.36 GHz
  • Available = 8.17 GHz

Mem Res

Task 5: Manage vSphere HA Slot Size

In a fail over the admissios policy uses slots control to define the failover capacity.

Screenshot (184)

The summary of the slots

Screenshot (185).png

  • Slot Size = CPU 32 Mhz Memory 82 MB
  • Total = 255
  • Used = 6
  • Available = 98
  • Failover = 151

Set the reservation of a VM CPU to 512 MHz

Screenshot (186)

The slots have changed

Slots

We now have a higher CPU size = 512, meaning less available slots.

We next configure a fixed slot size.

Screenshot (189)


Screenshot (188)

VM2-2-thin requires 2 slots.

Again the CPU and slots available has changed, to CPU 300 GHz

Slots2

And lastly we undo all these changes and reset to default by removing fixed slots.

Slots3

Task 6 : Configure a HA cluster with Strict Admission Control

Cluster memory use with 0 clients, note, I did not power off my Server Appliance, so memory use is still high.

  • Total = 28
  • Used =Ā  15
  • Free = 12

Screenshot (190)

The Lab cluster has no Server Appliance, so memory usage is minimal, but te cluster itself is using some memory evenĀ  with no VMs running.

Edited the memory resource settings for 2 VMs

Screenshot (192).png

Total slots is not the same as for the Lab, it is not N/A as I still have the server appliance running.

Screenshot (193)

The new memory slot size

Slots4

Slot memory size is now 335MB as a result of setting a reservation of 300MB for a now powered on VM. Calculated using the maximum reservation plus some overhead for the cluster.

The number of available slots drops from 255 to 62 because each slot now reserves 300MB of memory.

Slots5

1 less slot but size is the same after powering on second VM. The machine can power on because slots are available.

N slots total will allow the cluster to run N machines, but remember some of those slots are for fail-overs, so these slots will only fill in response to a failover. So I can only power on N – Failover slots VMs. A tricky question.

Task 7: Prepare for the next Lab

Simply a rest task to undo this Labs changes, so no need for screenshots here.

Critical Thought

Some tasks in this Lab were different from the Lab, task 6 required exploration of the cluster with all VMs powered off, obviously we could not power off the vSphere Server Appliance as e are using this to visualize and control our ESXi hosts and VMs.

Again highlighting the issues of completing Labs designed for a different envirnment.

That said, the principals involved here with high availability and failover are important to keep a production environment functioning to maintain the customers access to the system – important for any company


Vmware vSphere Lab 15

Managing Resource Pools

Task 1: Create CPU contention

We are going to force VMs to fight for a limited resource.

Screenshot (147)

Task 2: Create resource pools

To delegate control of the resources and compartmentalize the resources.

2 New resource pools are created, one with high CPU shares, our Production environment where performance is expected, and one with Low CPU shares, testing where we can live with slower performance.

Screenshot (148)

Screenshot (149)

Task 3: Verify Resource Pool functionality

Test has 2000 shares.

Production has 8000 shares.

Screenshot (150)

Screenshot (151)

Much slower in the test resource pool.

Changing shares to normal from low, improved the performance, but didn’t effct production.

medium

Critical Thought

This is a way of allocating a scarce resource so that we can separate our VMs into different resource pools and can change settings of the resource pool.

Here our business critical production environment and VMs will respond better to customer requests – a critical area for the business.

The test environment is a little slower but this is acceptable as the customers are not afeected.

Vmware vSphere Lab 14

Managing Virtual Machines

Task 1: Unregister a VM from the vCenter Server Appliance Inventory

VM2-3 is currently in Datastore-Local02-1.

VM2-3

Removed from Inventory, and no folder named VM2-3 exists.

Screenshot (133)

Screenshot (134)

Task 2: Register a VM in the vCenter Server Appliance Inventory.

We run the register wizard and its back.

Screenshot (135)

Screenshot (136)

Task 3: Unregister and Delete VMs

Simple task to right click on a VM and delete a machine if its not powered on.

Screenshot (137)

Being the conservative person I am, an not trusting these Labs, I will not actually delete the VMs.

Task 4: Take snapshots of a VM

A form of backup, a broken VM can be restored fromĀ  a recent snapshot.

Iometer is deleted from the desktop.

Screenshot (138)

A snapshot is created

Screenshot (139)Screenshot (140)

A second snapshot after deleting cpubusy

Screenshot (141)

And its all back, a third snapshot

Screenshot (142)

Task 5: Revert to a snapshot

The VM powered off, so it can reboot from the saved snapshot.

Screenshot (144)

Back to a snapshot with iometer and Cpubusy deleted and so not visible.

Interesting bug in the Lab, step 9 says Leave the Suspend this Virtual….. checkbox deselected. This checkbox does not exist on either the Flash or HTML 5 versions.

My guess is that this will leave the machine powered on because we have not told it to power off.

And of course both Cpubusy and Iometer are back.

Task 6: Delete a Snapshot

Screenshot (146)

Deleting an old snapshot has no effect on a running machine, no power off and all present and correct.

Task 7: Delete all Snapshots

Straight forward and had no effect on the machine, we are simply deleting old copies of VM with no effect on the current instance.

Critical Thought

A simple Lab demonstrating the power of snapshots to return a machine to aa previous saved state.

Great for back ups, although only a local on-site back up, so no good for disaster recovery.

Vmware vSphere Lab 13

Migrating Virtual Machines

Task 1: Migrate VMs from local to shared storage

Using VM2-2 on my ESXi host 2, storage name 172.20.10.51, theESXi host.

Lab13storageName

I had to create another VM with a thin provisioned disk as I had insufficient space errors.

Screenshot (154)

Screenshot (155)

Screenshot (156)

It worked

Screenshot (157)

Now in my shared storage, which is called Shared-VMFS

Capture


Task 2: Create a virtual switch and VMkernel Port Group

A second virtual switchĀ  and port group was created the same way as Lab 7. I have not repeated the screenshots here.

Screenshot (131)

Screenshot (132)

Task 3: Perform a migration of a VM on a shared datastore

For this task we use the VM network the VM is connected to , not a different Production network created by the Lab.

Start a continual ping.

Screenshot (158)

I has issues with storage capacity in this Lab due to over-provisioning of thick disks. So to complete this task I build a few new thin provisioned machines to migrate between the ESXi hosts.

The second part of this task to drag and drop migration. Essentially the same process just completed except for selecting the change compute resource only option to migrate and not the storage.

Screenshot (166)

Lots of steps not screenshot again.

Screenshot (167)

And VM2-2-this is on host 1.

Task 4: Perform a Compute Resource and Storage migration

I performed this task by successfully migrating a VM, VM1-2-thin from ESXi host 2 to host 1.

Screenshot (160)

Screenshot (161)

Screenshot (162)

Screenshot (163)

Screenshot (164)

Critical Thought

A relatively simple process once the storage capacity issues were resolve. I had to remove VMs that were thick provisioned and replace with thin provisioned to have enough storage on the ESXi host available for migration.

For future reference, any new VMs created remember to change the Disk to thin provisioned.

Vmware vSphere Lab 12

Modifying Virtual Machines

Task 1: Increase the size of a VMDK file

Making a bigger disk for a VM.

The disk is currently 32 GB and will change to 34.

Screenshot (124)

Screenshot (125)Screenshot (126)

Increased to 34 GB

Task 2: Adjust Memory Allocation

Straight forward, edit the settings and change the memory to any value you need.

Screenshot (127)

Task 3: Rename a VM

Screenshot (128)FolderName

Answer: The name changes but it is still in the hot-clone folder.

Task 4: Add and remove a Raw LUN on a VM

A Logical Unit Number for a storage block.

Screenshot (129)

I can’t complete this wizard, I have no target LUN, its something to do with my iSCSI storage which I will discuss with a colleague and the tutor.

Screenshot (130)

RDM, or Raw Dveice Mapping will allow us to directly access a LUN we have previously created and this means we can use this LUN for storage for a new virtual disk.